Epoxy Flooring Installation Process: Technical Guide for Nigeria
Industrial flooring decision guide
A successful epoxy floor is designed from the operating conditions backwards, tested before coating, mechanically prepared to a defined profile, installed within the selected product’s limits and accepted against recorded quality checks. This guide explains that process for facility owners, procurement teams, consultants and applicators in Nigeria.
Download: Epoxy Flooring Installation Process Manual by Epoxy Oilserv Nigeria.
Epoxy flooring installation process at a glance
- Define service conditions and acceptance requirements.
- Assess the slab, contaminants, repairs, joints and drainage.
- Test concrete moisture and record ambient conditions.
- Select the complete flooring system and agree quality hold points.
- Mechanically prepare, repair and clean the substrate.
- Apply primer, build coat, specified texture and topcoat.
- Protect the cure, inspect the work and document handover.
Critical rule: the current product data sheet and approved method statement control mix ratio, coverage, recoat window, temperature, humidity, dew-point margin and return-to-service time.
For buyers: define the floor before requesting a quotation
“Epoxy flooring” is a category, not a complete specification. A warehouse aisle, food-processing room, vehicle workshop, pharmaceutical area and office corridor may require different preparation, system build, texture, coving, topcoat and shutdown plan. A useful quotation begins with the facility’s service conditions—not a price per square metre alone.
| Input to provide | Why it changes the solution | Evidence to request |
|---|---|---|
| Facility type, location and floor area | Sets access, logistics, zoning and environmental constraints. | Site survey, measured area and phased-work plan. |
| Substrate age, condition and existing coating | Determines testing, removal, repair and preparation. | Condition map, photographs and proposed surface profile. |
| Traffic, wheel loads and impact | Influences system thickness, aggregate and finish. | Written system recommendation linked to duty. |
| Chemicals, oils, cleaning agents and temperatures | Exposure type, concentration, contact time and temperature affect selection. | Current resistance data for the proposed system. |
| Wet process, drainage and slip risk | Influences falls, coving, texture and cleanability. | Texture sample or mock-up and cleaning method. |
| Shutdown and reopening deadline | Controls zoning, cure protection and work sequence. | Programme showing preparation, coats, cure and release point. |
Need a flooring scope contractors can price correctly?
Send the location, approximate area, photographs or drawings, substrate condition, traffic, chemical exposure, preferred finish and shutdown date. Epoxy Oilserv will use the information to plan a site assessment and current quotation.
1. Assess the substrate and operating environment
The survey should establish whether the slab can support the intended resinous system. Record structural or moving cracks, laitance, weak concrete, spalling, hollow areas, oil contamination, curing compounds, sealers, previous coatings, damp zones, drains, construction joints, floor flatness and heat or wash-down exposure.
- Identify the slab type, approximate age and whether a vapour barrier is known.
- Map cracks, joints, drains, ramps, edges, penetrations and damaged areas.
- Record old coatings, curing compounds, oil, grease, dust and contaminants.
- Check concrete soundness and agree compatible repair materials.
- Record traffic, process temperature, wash-down, chemicals and cleaning practices.
- Identify moisture-test locations and any trial or mock-up area.
2. Test moisture and application conditions
Moisture-related failure may appear as blistering, loss of adhesion or discolouration. The test method and acceptance limit must match the selected system and its manufacturer’s written requirements. One convenient spot reading should not be treated as a universal pass.
| Check | Decision supported | Control |
|---|---|---|
| In-situ relative-humidity probes | Moisture condition within the slab at selected locations. | Compare with the flooring manufacturer’s published maximum. |
| Moisture-vapour emission testing | Emission from a prepared surface under defined conditions. | Use only where applicable to the specification and system. |
| Electronic moisture mapping | Comparative wet and dry risk areas. | Use as a survey tool unless expressly accepted for the decision. |
| Air and slab temperature, RH and dew point | Whether the environment is safe for application. | Record before and during work; follow the current data sheet. |
Stop and investigate: a failed or unresolved moisture result is not corrected by a sales promise. The response may require drying, drainage correction, compatible mitigation, another flooring technology or postponement.
3. Select the complete flooring system
The specification should name substrate preparation, repairs, primer, any moisture-control layer, body/build coat, aggregate broadcast or texture, topcoat, colour, coving and line marking. Every component must be compatible with the next. Compare suitable options in our epoxy flooring services and systems guide.
| Service condition | Question to resolve | Do not assume |
|---|---|---|
| Warehouse or workshop | Wheel type, load, turning action, impact and oil exposure? | That “heavy duty” means the same thing across suppliers. |
| Food or pharmaceutical area | Hygiene, wash-down, coving, drainage, texture and documentation? | That gloss alone establishes suitability or compliance. |
| Chemical-processing area | Which chemicals, concentrations, temperatures and contact times? | Universal chemical resistance from the word “epoxy”. |
| Wet or slip-risk area | What balance of texture, cleaning and drainage is acceptable? | That more aggregate always improves the total safety outcome. |
4. Mechanically prepare, repair and clean
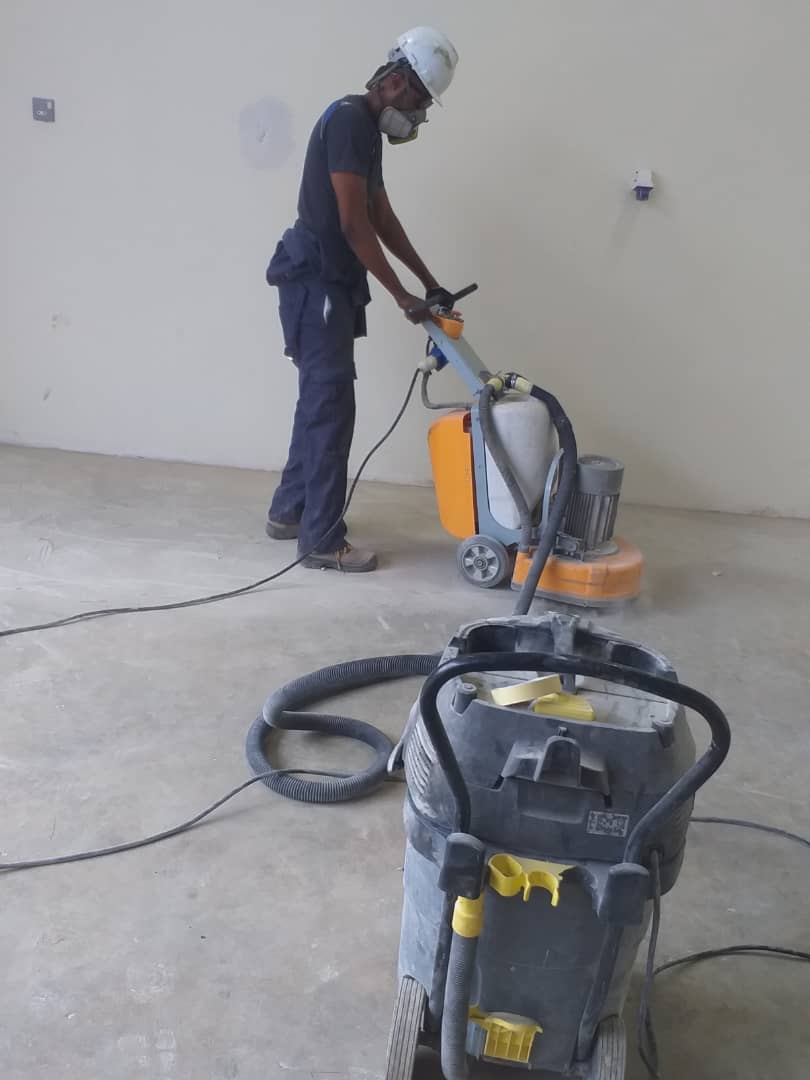
Surface preparation creates a sound, clean and suitably profiled substrate. Diamond grinding, shot blasting, scarifying or another approved method should achieve the specified profile without damaging the slab. Edges, columns, drains, upstands and thresholds require separate attention.
- Isolate the work zone and protect adjoining equipment and air intakes.
- Remove weak laitance, old coating, sealer and contamination to sound concrete.
- Create the profile required by the selected system.
- Repair agreed cracks, spalls, holes and irregularities with compatible materials.
- Treat moving joints as designed details—not ordinary cosmetic cracks.
- Industrial-vacuum the surface and complete the agreed cleanliness check.
5. Apply primer, build coat, texture and topcoat
Condition materials as required, protect part-used packs from contamination and mix complete units using clean equipment. Record batch numbers, start time and area covered. Do not alter ratios or add solvent unless the manufacturer expressly permits it.
| Layer | Purpose | Quality check |
|---|---|---|
| Primer | Promotes bond, wets the profile and may help control outgassing. | Uniform coverage, no contamination, correct overcoat window. |
| Body/build coat | Provides the specified resin build and receives aggregate where required. | Mix record, consumption, wet-film control and even distribution. |
| Broadcast or texture | Builds thickness or modifies slip/cleanability characteristics. | Approved aggregate, consistent rate and removal of loose excess. |
| Topcoat | Provides the selected finish and service-facing properties. | Colour, coverage, edges, pinholes and permitted recoat interval. |
Applicator quality-control plan
| Hold point | Record | Release question |
|---|---|---|
| Prepared substrate | Profile, cleanliness, defects, repairs and photographs. | Is the concrete sound, clean, dry to the system limit and correctly profiled? |
| Environment | Air/slab temperature, RH, dew point and ventilation. | Are conditions inside data-sheet limits? |
| Mixing | Ratio, time, crew, batch and time mixed. | Was the full unit mixed without unauthorised modification? |
| Application | Area, quantity, calculated coverage, equipment and layer. | Is the coat uniform and within expected consumption? |
| Final inspection | Visual defects, colour, texture, edges, lines and test results. | Are punch-list items closed before reopening? |
6. Protect curing and control return to service
“Dry to touch”, “ready for recoat”, “light foot traffic”, “vehicle traffic” and “full chemical cure” are different milestones. Reopen only at the milestone required for the actual service and after verifying the product data at the recorded temperature. Protect the area against water, dust, welding debris, forklifts and premature equipment placement.
7. Inspect and document handover
- Approved system build-up, colours, area and zone record.
- Current technical and safety data sheets.
- Batch, mixing and material-consumption records.
- Moisture, environment and quality-control results.
- Photographs of preparation, repairs, layers and completed details.
- Inspection and punch-list closure.
- Written return-to-service authorisation.
- Cleaning, maintenance, spill-response and repair guidance.
Floor life depends on the selected system, substrate, installation quality, service exposure and maintenance. See how long epoxy flooring can last and review our industrial project evidence.
Plan the installation before committing to a coating
Request a substrate-led assessment and quotation based on the real operating conditions, not a generic coating promise.
Frequently asked questions
How long does epoxy flooring installation take?
There is no reliable universal duration. Area, repairs, moisture treatment, number of layers, product chemistry, temperature, access and the required return-to-service milestone affect the programme.
Must concrete be tested for moisture?
Moisture must be assessed using methods appropriate to the slab, specification and proposed system. Acceptance limits come from the selected product and project documents.
Can epoxy be installed over an existing coating?
Only after the coating is identified and assessed for adhesion, compatibility and condition. Loose, contaminated, incompatible or weak material must be removed; a trial area may be required.
What causes epoxy flooring to fail?
Common contributors include moisture, weak or contaminated concrete, inadequate preparation, incorrect mixing, unsuitable conditions, missed recoat windows, incompatible components, premature traffic and a system that does not match the duty.
Request an epoxy flooring assessment
Include the facility location, approximate area, substrate, traffic, chemicals, cleaning regime, preferred finish and required completion date.
Technical references and related guidance
- ASTM F2170 — in-situ relative humidity in concrete slabs
- ASTM F1869 — moisture vapour emission rate
- ASTM D4263 — plastic-sheet indication of moisture
- Epoxy resins and hardeners
- Epoxy flooring supplies in Nigeria
This guide supports project planning and does not replace a site-specific specification, structural assessment, product data sheet, safety data sheet or competent applicator’s method statement.